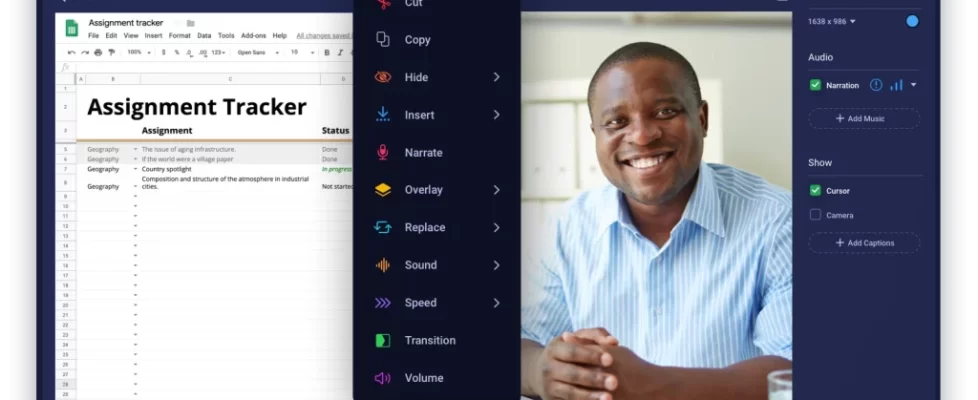
Screen recording is the process of recording activity on a computer screen. This can be useful for creating tutorials, demonstrations, or capturing game videos. Windows 10 and Windows 11 have a built-in tool for recording your screen — the Xbox Game Bar. You can find it pre-installed on your computer in the Microsoft Store. As a native screen recorder for Windows 10, this program allows you to record your screen without using other platforms.
But content creators often feel that the Xbox Game Bar doesn’t meet many of their requirements. You can’t use the Xbox Game Bar to record multiple programs simultaneously or capture the Windows desktop or File Explorer. These limitations cause many creators to look for other screen recorders with more advanced features, like ScreenPal’s screen recorder.
This article will show you how to screen record on Windows using the native Xbox Game Bar and the free ScreenPal screen recorder. We will also describe the features available on both platforms, so you can make an informed decision about which to use for screen recording on Windows.
How to screen record on Windows with Xbox Game Bar:
- Open the desired app or game you want to record.
- Press the Windows key + G to open the Xbox Game Bar. If this is the first time you’re opening the Game Bar, you’ll be prompted to enable it.
- To toggle the microphone on or off, press the Windows key + M + Alt. (You can test your microphone before getting started.)
- Once the Game Bar is open, you’ll see many different icons. You want to press the red circle with a line through it to start recording.
- A bar will appear at the top of the screen indicating that you’re recording. To stop recording, press the same button again (the red circle with the line through it).
- Alternatively, you can start or stop recording by pressing the Windows key + R + Alt.
- Your recording will be saved in the Videos\Captures folder as an MP4 file.
How to screen record on Windows with ScreenPal screen recorder:
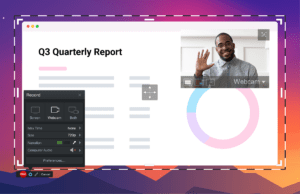
- Launch the screen recorder from the website. If you have an account, log in to your account and click the recorder icon on the upper right-hand corner of the page to Launch Screen Recorder.
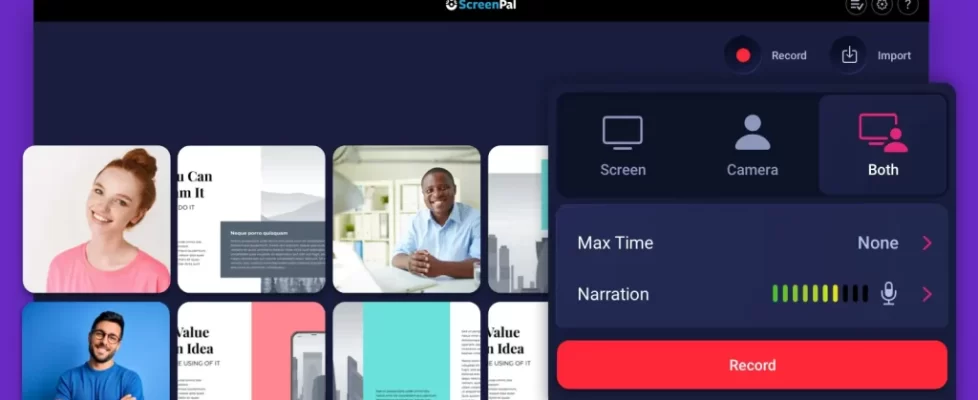
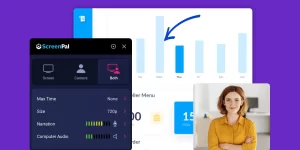
- Once the pop-up notification appears, you can select how you want to record. The following are some of your screen recording options:
- Select Screen, Webcam, or Both, depending on whether you want to record your computer screen, webcam footage, or both. You can even test your webcam to ensure your webcam video quality is suitable for your video needs.
- Select Size and whether you want to record the active window of your browser, full screen, or a part of the screen.
- Click Narration to select audio sources for the microphone.
- Click Computer Audio to record your computer’s audio.
- After making all the selections, click the red Rec button to start recording.
- Click the Pause button if you want to pause the recording to prepare more.
- If you want to re-record one section, go back to the section in the timeline from which you want to start recording again. You don’t have to start the recording from scratch.
- Click Done once you’ve completed the recording process.
- After you complete recording, you can execute the following actions:
- Click Save/Upload to upload the video to Vimeo, YouTube, or your hosting account.
- Click Quick Share to grab a link that you can share with your friends.
- Click Edit Video if you want to edit the video in the ScreenPal editor.
Benefits of ScreenPal’s screen recorder
If you’re looking for a free and easy-to-use screen recorder for Windows, you can’t go wrong with ScreenPal. While the default Windows Xbox Game Bar screen recorder is serviceable, it doesn’t offer the same features and flexibility as ScreenPal. Below, are some of the features of the Windows Xbox Game Bar and the ScreenPal screen recorder, so you can compare the two and make an informed selection.
Windows screen recording features:
- Record in full HD at 60 FPS
- Built-in microphone recording
- Record your screen and audio at the same time
- Share your recordings with your friends easily
The Windows Xbox Game Bar screen recorder is a handy tool that allows you to record your gameplay footage easily. In fact, this screen recording tool has been designed primarily to record gameplay, and that limitation is clearly felt in its features. The recording process can be resource intensive, which can cause lag or other performance issues. It can also be difficult to control the recording process, resulting in missed footage or other problems.
But the primary drawback of the Windows Xbox Game Bar program is that it only works within one application at a time. If you want to record gameplay, you can definitely use this tool. But if you want to record a task that involves multiple windows, such as using a code editor, browser, and document file, you will need to record separate files for each program. That limitation is a silver bullet that makes the Xbox Game Bar unusable to most content creators.
Furthermore, the Windows Xbox Game Bar screen recorder only records footage in Windows 10 and higher. If you are using an older version of Windows, you will not be able to use the recorder. Furthermore, the screen recorder can’t capture the Windows desktop or File Explorer, so you can’t use it to record your start menu or any activities on the desktop. You’ll need a more versatile and sophisticated screen recorder for all those functions.
ScreenPal screen recording features:
- Record the entire screen and/or webcam
- Overlay webcam footage on the screen recording
- Record a part of the screen, the complete window, or the full screen
- Create a virtual background for your webcam footage
- Take a screenshot of a part of the screen, the complete window, or the full screen
- Zoom into various parts of the screen while recording
- Trim and crop recordings without using an external editor
- Add captions to your screen recording file
- Add text, colors, shapes, and images to the video while recording
- Create and add animated GIFs to your video recording
- Save the screen recording file to your computer
- Share the file with your friends via email
- Public the screen recording file to Google Drive, YouTube, Facebook, or Twitter
As you can probably tell, ScreenPal’s screen recorder is a lot more sophisticated than the native Windows Xbox Game Bar program. Unlike Xbox Game Bar, you can use ScreenPal on all Windows, including Windows 10 and Windows 11. Instead of constantly creating new recording files for different programs, you can initiate screen recording and capture all the programs you need. You can also perform screen recording while capturing your webcam footage, making it ideal for tutorials.
Thanks to the built-in drawing tools, you can also make your screen recording engaging, using the drawing tools to write on the video, draw shapes, and interact with the viewers. As such, actions usually done in post-production can be executed while recording the video, making the process so much more seamless and efficient. You can record up to 15 minutes of footage with the free ScreenPal version, which is enough for most YouTube videos and tutorials.
Tips for screen recording on Windows
If you’re looking to record your screen on a Windows PC, there are a few things you’ll need to do to get started. Maybe you’re trying to create a tutorial, or perhaps you want to record a video of a video game you’re playing. Whatever the case, you’ll need to know how to record your screen on Windows. Below, we provide actionable tips for screen recording on Windows 10 or Windows 11.
1. Plan ahead
Before you start recording, take a few minutes to think about why you are making the recording. What is the purpose of the video? What information do you want to capture? Once you have a clear purpose for your recording, you can start planning what you need to do to achieve it. Your video’s purpose will also influence the screen recording tool you use, whether you use a microphone or computer audio, the resolution of the video, and everything else.
2. Use the right tool
There are a few different ways to record your screen on Windows, and the best one depends on what you’re trying to do. If you’re looking to create a quick and easy video, then you can use the built-in screen recording tool that comes with Windows 10 — Windows Xbox Game Bar. But as we have already discussed, this screen recording tool has numerous limitations that make it unsuitable for content creators. Your best bet is to use ScreenPal, a free screen recorder that offers the flexibility, versatility, and features of premium tools. Don’t forget to test your webcam to prepare!
3. Clear screen clutter
Before recording, take a moment to clear away any visual clutter from your screen, such as unnecessary desktop icons and browser tabs. If your screen recording will also display your desktop, ensure that the wallpaper isn’t too personal or inappropriate. A neutral wallpaper is ideal. This will help your viewers focus on the content of your recording rather than be distracted by extraneous items on your screen.
4. Free up system resources
To get the best performance from your screen recording, you’ll want to ensure that your system runs as efficiently as possible. One way to do this is to close any applications you’re not using. This will free up system resources that can be used by your screen recording application. This is especially true if you’re screen recording video games or other heavy applications requiring much processing power.
5. Check audio
While recording your screen, you’ll also need to think about the audio. If you’re recording a video tutorial, you’ll probably want to use a microphone to record your voice. But if you’re recording a video game, you might want to use the audio from the game itself. You must check your audio level to see whether you need microphone narration or computer audio. Nothing is quite as frustrating as realizing that your audio isn’t right after completing the recording process, especially since poorly recorded audio can ruin your recording.
6. Select resolution
The resolution you choose will depend on where you’re sharing your video. If you’re uploading it to YouTube, you’ll want to choose a resolution that’s appropriate for that platform — at least 720p. And if you’re emailing the video to someone, you might want to choose a lower resolution, such as 480p, to save on file size. You must select a resolution that works with your core requirements.
7. Test webcam
If you’re planning on recording your face along with your screen, you’ll need to test your webcam to ensure that the video and audio are working properly. Once you’ve done that, you can adjust the placement of your webcam so that it’s in the ideal position for recording. You should also check your webcam’s background to ensure it’s not too cluttered. A busy background can distract your viewers, so choosing a simple background or virtual background that won’t take away from your video is best.
8.Watch hard drive space
While recording your screen, the video files can quickly take up a lot of space on your hard drive. For that reason, it’s important to keep an eye on your available storage space and delete unnecessary files when needed. And if you don’t need to save the video on your computer, you can keep it in the cloud. ScreenPal is an excellent screen recording tool that can also host your videos, so you don’t have to save all of your projects on your hard drive.
If you follow these tips and how to screen record on Windows with the ScreenPal screen recorder, you’ll create professional-level videos and tutorials in no time!


